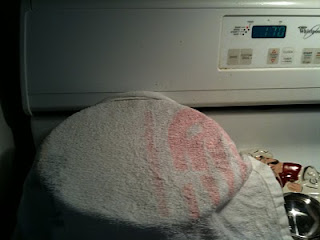
I hosted dinner for my best friend, her hubby, and my BF before we all went home for the holidays. I found this recipe on CL and thought it would make for an elegant vegetarian entree. Since the recipe called for 8 servings I halved the ingredients for this recipes. The servings are not that big so if you are not serving other sides, then I would suggest 8 servings for four people.
Ingredients
1 teaspoon olive oil
1 1/2 cups sliced shallots (about 8 ounces)
1/8 teaspoon sugar
1 tablespoon water
4 (8-ounce) packages presliced mushrooms
2 tablespoons dry Marsala or Madeira
2/3 cup low-fat sour cream**
1/4 cup chopped fresh parsley
1/2 teaspoon salt
1/2 teaspoon minced fresh or 1/4 teaspoon dried thyme
1/4 teaspoon freshly ground black pepper
8 sheets frozen phyllo dough, thawed
Cooking spray
1/3 cup dry breadcrumbs, divided
1 tablespoon butter, melted
Preparation
Preheat oven to 400°.
Heat olive oil in a large skillet over medium heat. Add shallots and sugar; cook for 2 minutes, stirring constantly. Sprinkle with water; cover, reduce heat to medium-low, and cook for 10 minutes, stirring occasionally until shallots are soft.
Add mushrooms; cook, uncovered, over medium-high heat 20 minutes or until liquid evaporates, stirring frequently. Add Marsala; cook 1 minute. Remove from heat, and cool. Stir in sour cream, parsley, salt, thyme, and pepper.
(I actually am not a big fan of sour cream so instead of sour cream I added two slices of the laughing cow light swiss cheese wedges, it gave it a creamier consistency and added a bit more flavor than I thought the sour cream would have given it)
Place 1 phyllo sheet on a large cutting board or work surface (cover remaining dough to keep from drying), and lightly coat with cooking spray. Sprinkle with about 2 teaspoons breadcrumbs. Repeat the layers with 3 phyllo sheets, cooking spray, and breadcrumbs, ending with the phyllo. Spoon 1 3/4 cups mushroom mixture along 1 long edge of phyllo, leaving a 1-inch border. Starting at the long edge with the 1-inch border, roll up jelly roll fashion. Place strudel, seam side down, on a baking sheet coated with cooking spray. Tuck ends under. Repeat the procedure with the remaining phyllo sheets, cooking spray, breadcrumbs, and mushroom mixture. Brush strudels with butter. Bake strudels at 400° for 20 minutes. Let stand for 5 minutes. Cut each strudel into 4 slices.
In the reviews, some stated that they had trouble with wrapping the mushroom mixture in phyllo. Phyllo is pretty forgiving if you are encasing food in many layers of phyllo, if it rips while you are wrapping the phyllo, just add another layer on top and no one will notice. You just have to make sure to move quickly as phyllo dries quickly which causes it to rip faster. Also, I would check the strudel about after 10 minutes, it might not need as much as 20 minutes in the oven
.
Friday, December 31, 2010
Thursday, December 9, 2010
Flatbread Dough
I have really stayed away from trying to make fresh bread for a while now. Last time I tried, I put a lot of heart and time into this honey wheat bread and it never rose....so after that I was a bit disheartened and strayed away from any baked products that required yeast. Last week, I thought it was time that I stepped it up and tried to make amends with my long lost friend...yeast.
Seeing that this was my re-entry into the dough world.. I thought I would attempt something less intimidating...flatbread dough. I mean after all if it doesn't rise, it is supposed to be flat right? It was a success and I found a go to flatbread recipe! So thought I would share the wealth!
Flatbread Dough
2 and 1/4 cups flour (divided)*
1 package yeast**
6 TBSP warm water (100-110 degrees)
1/2 cup warm water (100-110 degrees)
1/2 tsp salt
dash of sugar
*I won't lie I didn't bother dividing the flour right away
**I used regular activating yeast
Dissolve sugar and yeast in 6 TBSP warm water in a large bowl, stir in 1/4 cup flour and let stand 30 mins or until bubbly.
Seeing that this was my re-entry into the dough world.. I thought I would attempt something less intimidating...flatbread dough. I mean after all if it doesn't rise, it is supposed to be flat right? It was a success and I found a go to flatbread recipe! So thought I would share the wealth!
Flatbread Dough
2 and 1/4 cups flour (divided)*
1 package yeast**
6 TBSP warm water (100-110 degrees)
1/2 cup warm water (100-110 degrees)
1/2 tsp salt
dash of sugar
*I won't lie I didn't bother dividing the flour right away
**I used regular activating yeast
A couple of important things I realized this time around. I used a thermometer to check the temp of the water - this is very important! I realized that in the past my idea of warm was actually hot and it killed the yeast! This time around having the thermoter really helped!
Also it was really cold in my apartment that day so it was hard to find a warm spot to let the dough rise. My best friend Risa suggested setting my oven to the lowest temp and then placing my bowl of dough on top of the oven. Risa is a genius! Thanks my BFF! (not to be confused with my BF - BFF is best friends forever, and BF is boyfriend..yes I am still in grade school) If you do decide to go the oven route, make sure you don't use a metal/steel bowl because that conducts heats quickly and there is a chance it could start baking the dough)
Friday, December 3, 2010
Chicken Satay
We had a dinner party last week and I thought that chicken satay would be a party friendly finger food to have. Who doesn't like chicken satay with peanut butter sauce!
Here is what you need.
Skewers
4 TBSP peanut butter (I used creamy)
1/4 cup soy sauce
1/2 cup lemon or lime juice (I used lemon)
1 TBSP brown sugar
2 TBSP curry powder
2 cloves garlic (minced)
1 tsp hot pepper sauce
6 skinless boneless chicken breast cut into long strips
For best results, marinate the chicken in the chicken satay sauce overnight.
Before cooking you will need to soak the skewers in water for at least 20 minutes. (That way if you are grilling them, the sticks do not burn)
I grilled half of the chicken skewers on my george foreman and it turned out great. We also put half in the oven since we had so many and needed them to cook quickly but if you have time, I highly recommend the grill.
I also found a peanut sauce that went well with the chicken satays!
PEANUT SAUCE
1/2 cup peanut butter
2 TBSP hoisin sauce
1 TBSP fish sauce or soy sauce
1/4 cup water
I added a bit more peanut butter and water to this recipe but I would recommend tasting the original one first and then adding whatever you think it might need more of!
Pumpkin Cheesecake
I love pumpkin pie and I like cheesecake so I thought it would be interesting to make a pumpkin pie cheesecake, which has more emphasis on the pumpkin than cheesecake.
As per usual, I looked to my fav source, Cooking Light for a pumpkin cheesecake recipe. I mean cheesecake is without a doubt going to be somewhat fattening so I wanted to mediate as much damage as possible!
Here is the recipe below.
Ingredients
Cooking spray
1/2 cup graham cracker crumbs (about 4 cookie sheets)
3/4 cup granulated sugar
1/4 cup packed brown sugar
1 (8-ounce) block fat-free cream cheese
1/2 cup (4 ounces) 1/3-less-fat cream cheese
1 cup canned pumpkin
2 tablespoons reduced-fat sour cream
1 tablespoon all-purpose flour
1/2 teaspoon ground cinnamon
1/2 teaspoon ground ginger
1/4 teaspoon salt
1/4 teaspoon ground nutmeg
3/4 teaspoon vanilla extract
1/8 teaspoon ground cloves
2 large eggs
1/2 cup frozen reduced-calorie whipped topping, thawed
Cinnamon (optional)
Preheat oven to 325°.
I was a little wary about just putting the graham cracker crumbs without anything to hold them together, so I found another crust recipe. I used 8 graham crackers and I mixed them with one egg white and a 1/2 tablespoon with sugar and baked this for 8 minutes.
Then Combine sugars and cream cheeses in a large bowl; beat with a mixer at medium speed until smooth. Add pumpkin and next 9 ingredients (through eggs), and beat well.
Pour cheese mixture into prepared pan. Bake at 325° for 35 minutes or until center is just set. Turn oven off, and partially open oven door. Cool cheesecake in oven 1 hour.
Remove cheesecake from oven, and cover. Chill at least 8 hours or overnight. Serve with whipped topping, and sprinkle topping with cinnamon, if desired.
I did some variations of my own. I omitted the sour cream since I didn't have any on hand and I never really eat sour cream. I added the whole can of pumpkin since I love pumpkin but the cheesecake did taste more pumpkiny than cheesecakey..which was fine with me. If you like more of a cheesecake flavor, I would follow the instructions for only adding one cup then. I did not have any ground ginger so I added a teaspoon of pumpkin spice and did not add additional nutmeg or cloves. I also did not serve it with a whipped topping since I thought it might be rich enough.
Thursday, November 18, 2010
All American Chili
Nothing says warm comfort food better than chili..and what could be better than an All American Chili recipe. I found this recipe in guess where..yes Cooking Light! (You know how Rachel Ray is know for saying EVOO all of the time, well I guess I will be known for cooking CL recipes)
Anyways I really like this recipe. It is unique in that you use red wine in this chili. It was my first time adding red wine to chili, and the red wine flavor really came through on this one and tasted absolutely tummy warming and delicious!
Ingredients
6 ounces hot turkey Italian sausage*
2 cups chopped onion
1 cup chopped green bell pepper**
8 garlic cloves, minced
1 pound ground sirloin***
1 jalapeño pepper, chopped
2 tablespoons chili powder
2 tablespoons brown sugar
1 tablespoon ground cumin
3 tablespoons tomato paste
1 teaspoon dried oregano
1/2 teaspoon freshly ground black pepper
1/4 teaspoon salt
2 bay leaves
1 1/4 cups Merlot or other fruity red wine
2 (28-ounce) cans whole tomatoes, undrained and coarsely chopped
2 (15-ounce) cans kidney beans, drained
1/2 cup (2 ounces) shredded reduced-fat sharp cheddar cheese
*I used beef spicy italian sausage since the turkey sausages only came in big packs.
** I omitted the green pepper.
*** I used one pound of ground turkey.
Preparation
Heat a large Dutch oven over medium-high heat. Remove casings from sausage. Add sausage, onion, and the next 4 ingredients (onion through jalapeño) to pan; cook 8 minutes or until sausage and beef are browned, stirring to crumble.
Add chili powder and the next 7 ingredients (chili powder through bay leaves), and cook for 1 minute, stirring constantly. Stir in wine, tomatoes, and kidney beans; bring to a boil. Cover, reduce heat, and simmer 1 hour, stirring occasionally.
Uncover and cook for 30 minutes, stirring occasionally. Discard the bay leaves. Sprinkle each serving with cheddar cheese.
Wednesday, November 17, 2010
Polenta with Corn and Thyme
It has only been in the past year that I have started to understand the wonders of polenta. According to Wikipedia, polenta is made with ground yellow or white cornmeal (ground maize) originally made with Chestnut meal in ancient times.
It can be ground coarsely or finely depending on the region and the texture desired. What is also funny about polenta is that it was originally and still is classified as a peasant food. It is has only been in this late 20th century that polenta has become more popular in gourmet food.
The greatest thing about polenta is that it's so easy to make and you can do so many different things with it. I found a creamy corn polenta recipe in Martha's Stewart's Every day Food magazine. (I know quite different from my normal CL's issues)
In large saucepan, melt 1 TBSP unsalted butter over medium heat, add 1 cup frozen corn and 1 tsp fresh thyme leaves. Cook, stirring occasionally, until corn is warmed through, about 1 minute.
Add one cup whole milk (I used 2% milk) and 1 and 1/2 cups water and bring it to a boil. Slowly whisk in 1/2 cup fine yellow cornmeal. (Be sure to follow these instructions and use a whisk! Otherwise it will get clumpy!)
Cook, sitrring constantly until mixture is thick and creamy, about 6 minutes. Remove from heat and stir in 1 TBSP butter and 1/4 cup grated parmesan. Season with coarse salt and ground pepper. Serve immediately. Serves four.
I served this corn polenta with the honey spiced rub drumsticks. I added a little more red pepper this time and I ran out of honey so I did not glaze the drumsticks with honey. The extra red pepper gave the chicken a kick! The creamy, cheesy and buttery taste of the polenta went excellent with the spicy chicken!
Monday, November 8, 2010
Our Culinary Delights in DC
While we were in DC, my brother, the excellent host that he is, took us to some of his favorite places. We started our culinary tour of DC with some Greek tapas. I have had italian and spanish tapas, this was my first time having Greek tapas.
These puffy pitas came right after we sat down, and they were so light, warm, and soft. I was amused most by how puffy these pitas were!
After tapas, we went to the fish market. This was not just any ordinary fish market. My brother told that because the vendors have their storefronts half on the water, half on the harbor, they do not have to follow the usual restaurant regulations so they can serve food out in the open. There we had fresh shucked oysters and clams. The clams were a bit fishy but the osyters were fat and juicy!
And..my brother saved the best for last. After the marathon we rewarded ourselves with a plate piled with blue crabs at a little hole in the wall crab house in Bethesda, Maryland. We got little hammers with our meal and before we knew it we were busy cracking our whole crabs with some beers on the side. It was amazing!
Thanks bro for being an awesome host and giving us a glimpse of some of your favorite places so far!
Wednesday, November 3, 2010
I run 26.2 miles around our National's Capital
It is always fun to run a marathon in a new city. Having run the Chicago marathon the past two years, I have gotten used to the comforts of running a race that I have run before. I know the layout of the race, I know exactly where to go, and I know the parts of town where my friends will be cheering for me, and so forth. I wasn't sure quite what to expect for the Marine Corp Marathon. I knew that the highest elevation points in the race were going to be at mile 3, mile 8 and the last 26th mile. I knew the course would start in Virginia and bring us back into the DC area. And that was about it.
Though the amount of people running the Marine Corp marathon seems comparable to Chicago's marathon, it actually only has about half the amount of racers as Chicago has. (There were 21,690 people who finished the marathon.) Security was much more involved in this race. This race was the first race where I had to have my gear check bag checked by Marines before I could enter the race area.
The Marine Corp Marathon for me, was a hard course for me compared to the Chicago marathon. Here in Chicago, I have been spoiled by how flat Chicago is. Even though I knew the miles where the highest elevation would be, for some reason I didn't quite think that would mean the miles before that point would all be uphill.
The worse part for me were miles 20-23, where you run up the highway and then onto what seems like a never ending bridge into Pentagon city. The temp for that day called for sunny 65 degrees which is an ideal temp for a race, but on that interminable bridge with no water in sight, the weather felt like it was high of 80 degrees.
Yet, as tired as I was while running, what I love most about running a marathon, is that there are so many inspiring moments along the way that makes you forget about the pain. (well for a couple minutes at least) The wheelchair start for this race was only 15 minutes before the start for all other racers. The first three miles were all uphill so I ran by a couple wheelchair racers who were struggling to wheel themselves up hill. The hills were hard enough for my legs, I can't imagine having to use my arm power to push myself up for three miles straight! It is so inspiring to me the way other runners cheer each other on. As we were all pushing up the hill, I could hear runners cheer on the wheelchair participants. When I was experiencing a "hitting the wall" moment on the never ending bridge and was panting for water and I just stopped to walk, another runner ran by me and told me that I could do it! Whoever you are, thank you for you are the one that inspired me to stop walking and run!
I saw a marine unit running with bags and guns on their shoulders and saw that they ran in a protective unit and were surrounding a wheelchair racer to give him ample amount of space. After completing the trek on the long bridge, you have to run up an incline in order to run back down the highway, I saw a father pushing his grown child in a stroller to raise money for the disease she was suffering from. As tired as I was, I could not even imagine trying to run and push someone up a hill at the same time! I felt that I should not be complaining about my own pain if that poor guy had to run AND push someone.
The final 26th mile, you have to run up an incline to get to the last .2 miles. Sure it probably was not much of an incline but it is definitely much more steep than the one in Chicago's last 26th mile. It took all my strength just not to stop running on the hill. I was feeling so tired near the end, my legs felt like they were running through deep mud, and I was just willing my legs to go over the finish line. It was almost a surreal feeling crossing over the finish line. My finish time was 4:01:37.
I am super thankful for my two person cheering crowd - my boyfriend and my brother, who not only woke up at the crack of dawn to go to the race with me, but made sure to be at mile 10, 16, and 23. My BF and Bro even tried to run with me for a couple mins at a couple points just so they could talk to me. I really looked forward to the miles where I knew I would see them. I didn't realize how much the thought of seeing them would help me get through the race. (THANKS BF AND BRO!!!)
After the race, I feel like you always go over in your mind the things you could have done that would have gotten you a better time. Maybe if I did not stop as long for water during certain miles,would I have gotten a better time? If I did not walk for 30 seconds along the bridge, would my time have gone down? And though I can't help but think about this, I am also very proud of myself for making it through. To me, this course was harder for me than Chicago with all of the inclines, and if I can make a 4:01:37 time, I am only hoping that means the next time I do Chicago I can do much better than 4:01:37.
Friday, October 29, 2010
My Intention for the Marathon
In the beginning of some yoga classes, the instructor sometimes requests you to come up with an intention for that hour of practice. It can be a phrase, a goal, a wish,a dedication, just something for you to focus your thoughts on in that hour.
Even though I don't believe in all of the yoga speak (specifically those classes that have asked me to pretend I am tree and I am spreading the seeds with my breathing) I have found that setting an intention does help me to focus on some of those hard stretches and poses that are near the end. And I will admit it, I am a wannabe yogi so I kind of feel more in the zen mode if I set an intention. :)
So as I prepare to leave for DC today, I am setting my intention. My intention for this run will be my boyfriend.
As you probably have read in my previous entries, my BF and I have been training for this marathon together. Two weeks ago, he was seriously injured in a soccer game and his right calf swelled up to three times the size of what his left calf is. His right calf has not gone down much in size. Needless to say, he will not be running in the race with me. I am super bummed I am losing my running partner for the race. My BF is the one that usually keeps me going on our long runs. I am usually just trying to breathe and am sucking in wind while he is cracking up jokes. It is either the thought of wanting to push him off the road, or the thought of not wanting to disappoint him, usually the latter, that is what motivates me to keep going.
The resilient guy that he is, even though he has been in immense pain, and has barely been able to walk, he has been keeping his spirits up for me and has been encouraging me to continue on in this race. Even though he is the one in pain, I feel like I have cried more than he has over his calf. (yes I am a baby, and if I was the one who was hurt, I would definitely not be taking it with as much honor and pride as he is, rather I would be whining a lot and throwing things at the wall.) So I admire him even more for how strong he is, even when he is injured.
So that is why I am going to set him as my intention for the race. I will run for all of the hard work he has put in this summer. I will run for him because he deserves more than anyone, to be in this race.
Who knows what race day will bring, all I can do is set my intention and aim for the finish line.
Thursday, October 28, 2010
Fall = Comfort Food =Chicken Pot Pies!
You can always tell when Fall has arrived. The sky turns a little gloomier, the wind blows a little harder and stronger. The air smells crisper and there are hints of firewood, and you find yourself craving a warm cup of hot cider or in my case, a pumpkin latte. The coming of this colder weather has had me seeking out recipes for comfort foods. Last week I made spinach and beef lasagna (oops sorry forgot to blog about that!) and this week I found a recipe for a healthy version of Chicken Pot pie.
Chicken pot pie always reminds me of my dad, he used to get Chicken pot pie from this restaurant called Tippins in St. Louis, and then when Tippins closed, he used to buy all of these frozen individual chicken pot pies and keep them in our freezer. I was never a big fan of these. Perhaps it was because I lack the virtue called patience and I think one time I was too impatient to wait for the oven to cook my individual chicken pot pie throughly and just microwaved it and it turned out in this disgusting soggy mess. That was the last time I had chicken pot pie.
You can't deny that just thinking of Chicken pot pie somehow brings a warm and fuzzy feeling to your stomach so I decided that it sounded good for a windy fall night. I found a makeover recipe for Chicken Pot pie (where they take a recipe full of fat and calories and make a lighter version) This recipe called for root vegetables. I didn't want to use root vegetables, so I did the following.
Ingredients
3 cups fat-free, less-sodium chicken broth
1 cubed peeled baking potato
1/2 cup chopped carrot
3-4 stalks chopped celery
1/2 large onion diced
1 pound skinless, boneless chicken breasts, cut into bite-sized pieces
1/4 cup frozen green peas, thawed
1/4 cup frozen corn, thawed
2/3 cup all-purpose flour (about 3 ounces), divided
1 1/2 cups fat-free milk
1/4 cup chopped fresh parsley
2 tablespoons chopped fresh thyme
1 1/2 teaspoons salt
1 teaspoon freshly ground black pepper
Cooking spray
1 sheet frozen puff pastry dough, thawed
Preparation
Preheat oven to 400°.
Bring broth to a boil in a large Dutch oven. Add potatoes and next 3 ingredients (through onions) to pan; cover, reduce heat, and simmer for 6 minutes. Add chicken; cook for 5 minutes or until chicken is done. Remove chicken and vegetables from broth with a slotted spoon; place in a large bowl.
Increase heat to medium. Lightly spoon flour into dry measuring cups; level with a knife. Place all but 1 tablespoon flour in a medium bowl; gradually add milk to bowl, stirring with a whisk until well blended. Add milk mixture to broth; cook for 5 minutes or until thickened, stirring frequently. Stir in chicken mixture, parsley, thyme, corn and peas, salt, and pepper. Spoon mixture into an 11 x 7-inch baking dish coated with cooking spray.
Sprinkle remaining 1 tablespoon flour on a work surface; roll dough into a 13 x 9-inch rectangle. Place dough over chicken mixture, pressing to seal at edges of dish. Cut small slits into dough to allow steam to escape; coat dough lightly with cooking spray. Place dish on a foil-lined baking sheet. Bake at 400° for 16 minutes or until pastry is browned and filling is bubbly.
This recipe does take at least a hour to prep and bake. I only had a 9x9 pan so I put half of the mixture in the pan, and the rest of it in two large ramekins. Next time I will buy more ramekins and make them in those. I found that in a large pan it came out a little watery and was hard to serve. Also the puff pastry took more about 20-25 minutes to cook. The puff pastry in the ramekins cooked faster but if you are using a large pan, the puff pastry will take longer to cook.
Here is the link for the chicken pot pie with root vegetables if you would like to use root vegetables.
http://find.myrecipes.com/recipes/recipefinder.dyn?action=displayRecipe&recipe_id=10000001654677
Spicy Honey-Brushed Chicken Legs
I was in the mood for some chicken drumsticks so I looked through my CL recipes to find one that would satisfy my craving. I found the Spicy Honey Brushed Chicken thigh recipe. Instead of using thighs I used a package of six drumsticks. Here is the recipe below.
Ingredients
2 teaspoons garlic powder
2 teaspoons chili powder
1 teaspoon salt
1 teaspoon ground cumin
1 teaspoon paprika (i used smoked paprika)
1/2 teaspoon ground red pepper
8 skinless, boneless chicken thighs
Cooking spray
6 tablespoons honey
2 teaspoons cider vinegar
Preparation
Preheat broiler.
Combine first 6 ingredients in a large bowl. Add chicken to bowl; toss to coat. Place chicken on a broiler pan coated with cooking spray. Broil chicken 5 minutes on each side.
Combine honey and vinegar in a small bowl, stirring well. Remove chicken from oven; brush 1/4 cup honey mixture on chicken. Broil 1 minute. Remove chicken from oven and turn over. Brush chicken with remaining honey mixture. Broil 1 additional minute or until chicken is done.
The drumsticks were pretty thick so they actually took longer to cook. Since I was also making sweet potato fries in the oven, I didn't want to use the broiler setting so I set both the sweet potato fries and the chicken legs on bake setting at 425 degrees. After about ten minutes in the oven, I noticed that the chicken legs were taking a long time to cook so I actually ended up cooking the chicken legs in a skillet. It still tasted great and I had more control of finishing the cooking of the chicken at the exact time they were cooked through so the chicken was super tender. If you do cook this on a skillet, make sure that you first sear the top and bottom of the chicken leg to seal in the flavor, then put a lid on top of the skillet so that you are essentially cooking and steaming the chicken so it cooks faster and doesn't burn as easily.
Sweet potato fries made an excellent side for this dish, and sweet potato fries are one of my favorites sides. (You can't go wrong with sweet potato fries) Plus these fries are baked not fried so you can feel less guilty about eating them!
Sweet Potato Fries
Take three large sweet potatoes (this is enough for 3 people) and microwave them for about 5 minutes. Then chop sweet potatoes into long wedges (so that they look like fries) In a large and deep bowl, put 2-3 TBSP of olive oil, and a couple shakes of salt and freshly ground pepper. Throw in the sweet potatoes and toss in the oil mixture. Then spread out on a greased cooking sheet and bake at 350-400 for 30-40 minutes. Bake for about 15 - 20 minutes and flip the fries over to the other side and bake for another 15-20 minutes.
Monday, October 18, 2010
Chicago Urbanathlon 2010
My BF and I signed, along with my BF's sister in law, to do the Chicago Urbanathlon. What? You have not heard of this? Don't worry, not very many people have. The Urbanathlon is sponsored by Men's Health and is a substantially smaller race. My BF actually did this last year and that was the only reason why I knew about this. Since my BF's sister in law wanted to do this, we figure it would be a good race to do. This race is the most unique race I have ever done and certainly kicked my butt, not once but several times over.
The Urbanathon is a 9+ mile run with six obstacles in between, sound easy enough? I thought so too, until I saw the obstacles in person. This urbanathlon is really targeted to the male population. When you sign up for the urbanathlon, unless you have ran and had a respectable time the year before, you are automatically signed up in a starting wave. My starting wave was 10. I realized the night before after looking at the assigned waves, that the waves are assigned according to elite status (if you have run the year before and met the minimum time for this start) and then, the next eight waves were all Males from the youngest age group first to the oldest men's age group being the second to last wave. That meant that wave 10 was ALL just solo female runners. (oh yea they had relay teams too, which in my mind, if you are going to run relay, you look lame running relay for this race since you basically only run 3 miles and do one obstacle) So naturally I was so pissed to find out that this race placed ALL of the females in the back. I was fuming and was totally ranting about how sexist this race was. I said they probably placed all of the girls in the back because they didn't think we could do the obstacles!
Then I told my BF that my goal was to beat as many guys as I could. So I actually ended up starting with my BF in his wave (he was wave 4) and when we reached the first obstacle, I realized why they put all of the girls in the back.
After you run three miles to Navy Pier (Start is at Columbus Dr.) you have to walk on top of the barricade like you would on a balance beam, then you have crawl over tires. In the picture, the tires don't look so bad,they kind of look like normal tires right? Wrong! I have no clue where they found these tires, but in person these tires were taller that I was! I tried hop and did not even reach the top. My BF actually hopped on top and basically had to pull me over it.
After the first obstacle, you run toward Museum campus and on the way you encounter the second obstacle which consists of hopping over two barricades and crawling under two barricades, there were six of these in all. This was probably my favorite obstacle.
Next, you run toward Soldier field, and this is where we met my new found worst enemy, the military hurdles. Actually they should not even be called hurdles because that implies that you can jump over them. These military hurdles were almost more than twice my height. Ideally you are supposed to be able to hoist yourself and then push yourself up, yes that would be ideal if my shoulders actually reached the hurdle. So my boyfriend had to bend down and put out his hands for me to hop on and then he basically threw me over these hurdles. There were six of these as well.
After these, we run up the stairs to McCormick place and then the next obstacles are a military crawl under nets, monkey bars, and then another military crawl under nets. If you miss a rung in the monkey bars or fall before getting to the end, you have to do the monkey bars over so I took it pretty slow on these so I wouldn't miss and fall!
The second to last obstacle is Soldier Field itself. They make you run up the steps of the stadium, run inside up through the stairs to the box area, back down the ramp and back up all of the ramps through Soldier field. Then they take you into the seating area of the stadium and you proceed to run up and down twice in the seating area. My legs were shaking after this one. Then we had two more miles until finish...
After two miles, what was left between us and the finish line, were two rows of cabs you have to hop over, a bus you have to scale, and a 10 foot wall.
I slide over the front of the cab (hint from my BF who did it last year) and scaling the bus was not bad because they have netting for you. It's just tough because the net is moving so much from the force of other climbers.
This race is actually pretty fun and it's unique in that it is not just running. Finishing this, I felt just as proud of myself as I would after a full marathon!
We finished this race in 1.27. (So I did manage to beat out a lot of guys!) But honestly, I could not have done this race without the help of my BF who so patiently waited for me through the obstacle and threw me over the huge tire and military hurdles. Also without him, I probably would have slowed down substantially in the end. So BF if you are reading this, thanks for your patience, support, endless encouragement and drive! You are the best!
Wednesday, October 13, 2010
The Last Six Miles
So at dinner tonight, my friends were asking me about my reasons for running a marathon and they asked me what were the first feelings I feel when I finish a marathon. I told them that you are usually in a lot of pain by the time you cross the finish line, and the first feeling is immense relief. You are just SO happy that you are done with it that you are just beside yourself that it is finally all over. So then my friend asked, then why do you do it then? I found myself hesitating before answering, and I realized it's so much harder to explain out loud. You can't even begin to explain the feeling of accomplishment that comes over you after you realize that wow you did it! You ran for 26.2 miles straight and you are still alive.
So coincidentally, I was reading my new issue of Runner's World (which by the way I highly recommend if you love running!) on the way home after this conversation and there was an article in there titled "The End" by Peter Sagal. I think Peter describes my reason for running marathons perfectly!
In this article, Peter also questions why we as marathoners continue to run marathons even though we know how much the last six miles hurt. Sure the marathon training guide takes you up to 20 miles, and it's tough no doubt but it doesn't seem bad. It is the last six miles that make all of the difference. Once you pass 20 miles, your body is like a home appliance that just passed the deadline on its warranty and is starting to fall apart.
Peter states, "What I have found is that the last six miles separate distance runners from those who are merely obsessive or have a high tolerance for boredom. They are crucible from which come molten, freshly recast marathoners, and each one of those miles is a distinct trial to conquer, and reason to train, and reason to boast, and as such, in truth, I love them, because though you'll never know exactly why you do them, it's over those last six miles that you finally find out if you can."
When I read that, I couldn't help but smile because that is exactly why I run marathons. So thank you Peter for phrasing that just so eloquently.
I am hoping that in three weeks, when it's my turn to face those last six miles, I will remember Peter's words and look those six miles in the face and say, BRING IT! (Obviously I am not as eloquent as Peter is :) )
Monday, October 11, 2010
Kumas - Our treat to ourselves after our last long run!
This past weekend, my BF and I did our last long run. We went up to 21 miles and this will be our longest run before attempting the DC marathon. The next few weeks will be all about tapering.
As if the thought of 21 miles was not dreadful enough, we knew that the weather for our run was actually going to be quite warm, the high for the day was 80 degrees. Quite a change of pace from our previous long runs that have been in cold, windy and damp weather. I am not sure which is worse, strong gusty winds or sweltering heat, but I do not look forward to running in either!
After running 21 miles, it's both defeating and overwhelming to feel incredibly tired after running 21 and knowing that for the actual race, you have about another 5.2 miles to go before you are finished.
It is true what they say though, the training guide will take you up to 20 miles, but adrenaline and the excitement on race day will take you all the way to 26.2. After 23 it's a matter of telling your legs that they can do it no matter how much it hurts at the moment! (Wish us luck that it will take us there fast enough to get under 4 hours!!)
After our 21 miler, I requested that we have something to reward ourselves. And our treat was Kuma's corner. Imagine a small bar, filled with people both sitting down and waiting to be seated. In the background, heavy metal music is playing so loud that you can barely hear the person sitting next to you, every waitress has at least a sleeve that is tattoed, and in the back, there is a tiny tiny kitchen where three to four cooks are tearing up the kitchen, firing up the best burgers you will ever eat...and there you will have Kuma's Corner. There is always a wait for Kumas, you are lucky if you can get a seat within a hour. The bar area is first come first serve and we were lucky enough to snag two chairs within 20 minutes of being there. However, since the size of their kitchen is the same size of my bathroom, and there are about 30 people waiting for their orders, expect at least a 30 minute wait for your food. All of this though is WORTH IT!
This is an amazing Kuma's" burger, simple yet absolutely delicious! The Kuma's burger is a burger with bacon, cheddar, and an egg on top! Kumas cooks your burger the way you want it cooked, and in our case, we wanted medium rare!
Kumas' also has excellent Mac and Cheese, you can add a bunch of items to your mac and cheese (we chose broccoli and red pepper) and they give you a huge portion. Warning though, the mac and cheese is not as good re-heated. It actually grossed us out to reheat it as we saw that after microwaving our mac and cheese, there was a flood of oil at the bottom so our mac and cheese tasted like grease.
10.10.10
This past Sunday on 10.10.10 was the Chicago Marathon!! My BF and I went down to the Marathon to cheer on one of my good friends Jenny who was running her first marathon. I knew that going to the marathon would make us feel antsy since it's kind of funny to go to a marathon that is not yours knowing that just in a few weeks, it will be our turn to run! We are at the point in the training, where you just are tired of doing long runs on the weekend and you just want it to be over. However after our long run, I was grateful that we were just going to be spectacting and not running the 26.2 miles. At the end of the day we found that watching the Chicago marathon made us excited and eager to run the DC marathon..and have it finished and completed!
The Chicago marathon is always an amazing race to watch. It is always so inspiring to see so many runners running a marathon, especially when you know how much time and dedication marathon runners spend in preparing for this one race. You spend 3-4 months training for just one race day, in hopes that training can see you through 26.2 miles. The Chicago marathon is tough just because you can never predict the weather. Last year when I ran it was a chilly 50 degree start and I think it never even hit 70 degrees that day. I remember wanting to run just to stay warm! This weekend, I felt so bad for the marathon runners, we stepped out of the house around 8am and already I knew within a hour I would not need a long sleeve shirt. By 10:30am, we could already feel the heat of the sun starting to sear into our legs..and we were only standing and cheering. My heart went out to the poor marathoners who were already soaked with their own sweat at only 9 miles in.
Not only am I amazed and amused by the runners who are dressed in crazy costumes, I am even more baffled by the runners who decide that running 26.2 miles isn't challenging enough and they have to do something else like juggle while running! It is hard enough for me to focus on finishing 26.2, I couldn't imagine trying to do something else while running!
The best part about watching the Chicago marathon is you can feel all of the positive energy and optimism from the spectators, the appreciation and spirit from the runners, and you just can't help but feel hopeful and proud of everyone - the spectators for taking their time to cheer on not only their friends an families who are running but also strangers, and the runners for their spirit and dedication through their struggle for the finish line.
So congrats to all of the runners who ran Chicago on 10.10.10. It's no easy feat, and you deserve all the congratulations and all of the rest afterwards!!
Tuesday, October 5, 2010
STL! Toasted Rav and The Cupcake Cakery!
I am from St. Louis, the city best known for the "Arch" and the "Cardinals".
St. Louis is also home of toasted ravioli. For those of you who never had the pleasure of having this deep fried appetizer, it is basically a ravioli, coated in bread crumbs and deep fried. There is usually ground beef in the raviolis. Then you dunk this ravioli into marinara sauce. Growing up, these were always a staple in our freezer at home and my brother and I would make them for a quick snack after school.
If you are interested in learning more about deep fried ravioli, I have included the wiki link here! http://en.wikipedia.org/wiki/Toasted_ravioli
I was also happy to discover that the cupcake trend has started in St. Louis. In fact, I think the Cupcake Cakery in St. Louis could rival Sprinkles' cupcake base. I found the actual cupcake to be very moist and soft. Even after a day in the fridge, the cupcake still maintained its' taste and moisture. My family also agreed that the base was really good. However, we all found the icing lacked flavor and creaminess. We all scraped the icing off our cupcakes and just ate the cake part. I guess you could say that we ate reduced fat cupcakes then. Ha ha ha.
This was the pumpkin cupcake. Yummy cake part, but the icing was cinnamon sugar which did not go with pumpkin cake. Also the cinnamon sugar gave the icing a weird texture.
Friday, September 24, 2010
My Favorite Chocolate Chip Cookie Recipe
My ideal heaven would smell constantly of either fresh clean laundry or freshly baked chocolate chip cookies. If there is only thing that can beat the smell of a fresh baked chocolate chip cookie, it is EATING a warm gooey chocolate chip cookie right after it has come out of the oven.
So since I am a sucker for freshly baked chocolate chip cookies, I bake them frequently. My go to recipe comes from of course...CL! Knowing it is from CL makes me feel less guilty about eating a million cookies when I am baking..and besides they taste absolutely terrific!
Here is the recipe from CL.
2 1/4 cup all purpose flour
1 tsp baking soda
1/4 tsp salt
1 cup packed brown sugar
3/4 cup sugar
1/2 cup butter softened
1 tsp vanilla
2 large egg whites*
3/4 cup semisweet chocolate chips
Preheat oven to 350 degrees
Combine flour, baking soda, and salt, stir with whisk.
Combine sugars and butters in large bowl. (I am old school and do this with a wooden spoon, you can use a mixer if you like but I like to cream butter and sugars with a spoon so that everything is blended in nice and evenly)
Add vanilla and egg whites; beat one minute.
Add flour mixture and chips, beat until blended. With this recipe, I find that the dough turns out a little dry, so if it is too crumbly, I add a little bit of water to the mix.
Drop dough by level tablespoons 2 inches apart onto cookie sheets. Bake at 350 for 9 minutes. I like my cookies just a tad underbaked, the recipe calls for 10 mins but I usually pull them out around the
8-9 minute mark so they are extra gooey!
*It is a good rule of thumb to have the eggs and butter at room temp before baking. I always forget this! Also if you don't have enough eggs, you can always just use one egg in place of two egg whites. One egg yolk isn't going to break the diet ;)
Subscribe to:
Posts (Atom)